LIMBERT DESK REIMAGINED

As I flipped through an old Charles Limbert catalog, a postcard desk caught my attention. The desk appears in the 1915 catalog, labeled #801-24. While this petite desk was too small for my needs, the details of craftsmanship and design were fascinating. Part of his “Ebon-Oak” line of furniture, Limbert’s #801-24 featured inlaid ebony designs and natural cane webbing adorning the backsplash.
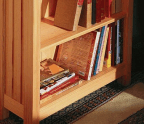
I felt that a few changes were in order, but I wanted to maintain the essence of the original piece. The entire desk was scaled up in size, and I added solid plank sides featuring rectilinear cutouts. The desk’s back is closed in with a sturdy frame and panel, and I changed the original single-drawer design to a bank of three drawers instead.
Begin with Some Leg Work
The legs involve a deceptive amount of woodworking and are a good place to start. They measure 2½" square by 30" long, and I chose to laminate them for quartersawn figure on each face. (Rift-sawn stock also works well and skips the laminating step.) Once the leg blanks are milled to final dimension, you can lay out and cut the mortises. There’s a mortise in each front leg for the front arched rail and a pair of mortises in each rear leg for the upper and lower back rails: all of them are 1/2" wide and 1½" deep.


Now lay out the square inlay design on the two front legs. By hand or with your largest hollow mortising chisel, carefully excavate the 1" x 1" square mortises. While the original Ebon-Oak line of furniture used ebony, I find walnut is a reasonable substitute. Rip a strip of walnut until it just fits into the square mortises. Carefully crosscut the pieces to size, and chamfer their back edges slightly to ease the fit into the mortises.
Install an edge guide and 1/4" spiral bit in your router to mill the channel that connects the two square mortises. This