Australian Photography

PAINT LIKE A PRO

Located at the top of the Develop module is one of Lightroom’s most useful tools – the Adjustment Brush. At its essence, the Adjustment Brush gives you access to Lightroom’s major global editing tools like Temperature, Exposure and Contrast, but with the ability to localise your edits.

From making tweaks to highlights, whitening teeth or sharpening up a small part of an image, I find it’s rare that I edit an image without using it at least once.

In this tutorial, I’ll share a few different ways you can use the Adjustment Brush to enhance your images. The Adjustment Brush icon can be found in the Develop module below

You’re reading a preview, subscribe to read more.

More from Australian Photography

Australian Photography8 min read
Film Back To The Future!
Once, rumours of film’s imminent death seemed plausible, but hindsight shows the obituaries were premature. Even in an era of digital domination, a small cadre of artists have continued to create powerful and emotion-laden work on film. Now in 2024,
Australian Photography2 min read
Create Your Own Lightroom Presets
Using Lightroom’s presets are a handy way to speed up your workflow. They allow you to use commonly applied settings at the touch of a button, saving valuable editing time. And while Adobe has greatly expanded its own preset offerings over the years,
Australian Photography2 min read
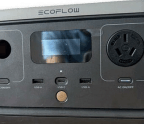
Ecoflow River 2 Portable Power Station
Portable power is something we increasingly need in an era of battery-powered everything, but what do you do when that wussy little powerbank won't cut it? Well, get a bigger one! Having reached the limits of what my little USB-C powerbank can delive

Related